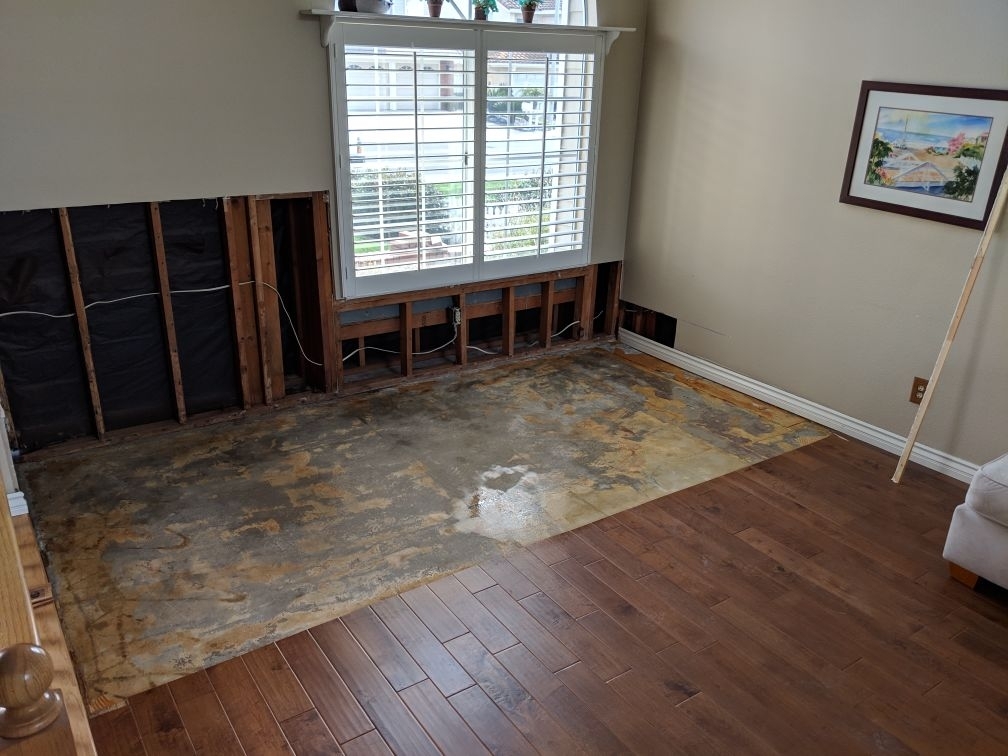
Just as the source of water can range from a spill at the dining room table to inundation by floodwaters, water damage to hardwood floors can range from minor discoloration to total destruction.
Despite a protective finish, any source of moisture — even high humidity — can lead to a wood floor’s deterioration. Water makes its way through the tiniest of openings to be absorbed and then trapped. The wood swells and mold may invade. When that happens you’ll want to protect your investment in your home or business and take action to rescue and restore those gorgeous floors.
The Damage and What to Do
The first step, of course, is to stop the source of water then remove as much of it as possible. The extent of damage then depends on how quickly you were able to act and the extent of flooding, and the type of finish. The latter can range from “old school” waxes to oils and other penetrating finishes to urethane and other contemporary protective coatings.
- Stains and Discoloration White-ish spots are likely limited to the finish itself and may go away on their own if left to dry for a few days. If not, a good rub-down with your usual floor polish should do the trick. Dark areas are a different matter. Scrubbing with a toothbrush and a little oxalic acid (a bleach for wood) may be enough. Or it may be necessary to lightly sand or use steel wool to get past the finish first. It might even be necessary to sand into the wood a bit, bleach, and re-finish. In the worst case, the affected area may need to be replaced.
- Mold can cause its own staining. In addition to dealing with the discoloration, it’s important to thoroughly decontaminate the area. And that’s likely to involve sanding, drying, and refinishing.
- Cupping and Crowning Floor planks can swell from wetness or even high humidity in such a way as to make their long edges curl upwards or downwards. The first step is to solve the dampness problem. Given time (several weeks or more) for the planks a well as the underlying sub-floor to dry, cupping and crowning may go away on its own. Otherwise, it will be necessary to sand and refinish the hardwood floor.
- Warping along the length of boards can lift them a bit off the sub-floor It may be possible to flatten slightly warped floors with heavy objects, or to nail them down and hide the nails with caulk. More severely warped floor sections will need to be replaced.
- Buckling Warping, cupping, and crowning can be severe enough to lift boards well above the sub-floor Replacement is likely the only option.
A Few Details
The above actions are just a quick outline of the actions that need to be taken. If you don’t call in a water damage restoration specialist you’ll need to research them in detail. Here are a few more things to dig into.
Wood color changes naturally with age and sun exposure, so a sanded area may have a slightly different color. It takes a lot of skill and experience to apply a wood-stain product to match, so it’s common to sand and refinish the entire floor so that the restored area doesn’t stand out. That’s part of good long-term hardwood floor maintenance anyway.
Lightly sanding removes the finish and allows the wood to dry out faster. But final sanding should be performed only after the floor has returned to its proper moisture content. Otherwise cupping, crowing, and warping may be “reversed” as things return to their original shape. Full drying without special equipment can take anywhere from a week to as long as 6 months. Drying too quickly can cause wood to crack and need replacing.
Also, with flooding make sure the sub-floor is also dried, disinfected, and repaired as necessary before replacing and refinishing the flooring.
The Big Picture
The key to keeping water damage to hardwood floors to a minimum is to immediately remove the water then aggressively dry the floor. Anything more than a spill or small leak can require special training and advanced equipment (such as commercial-grade humidifiers and drying mats) to dry things out quickly enough to prevent mold and further damage.


