Hardwood floors are a premium part of any beautiful home. Unfortunately, anything more than a small spill can lead to damage ranging from staining to cupping, warping, and buckling.
By the time you notice the damage, it’s too late to prevent it. So it’s critical to remove any water immediately. Even with flooding and standing water, it’s possible to rescue hardwood flooring if you act quickly and aggressively enough. The first 48 hours are the most critical.
Here we’ll go over the key issues, tasks, and concerns. But we will not delve into detailed instructions.
The Damage Done
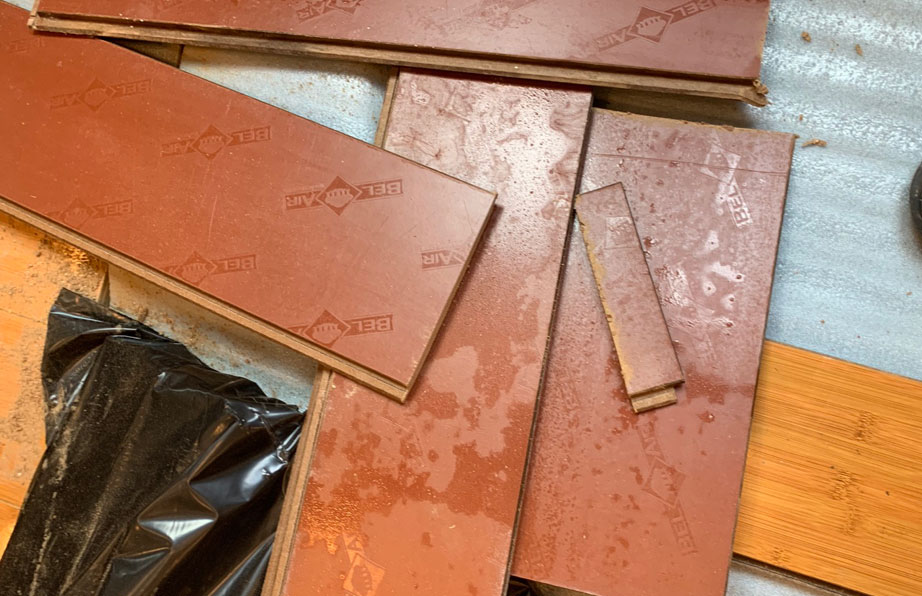
Even well-sealed wood floors are subject to damage. Water still manages to penetrate through the tiniest of cracks wherever they might be — through seams, under baseboards, around heating registers, and so on. As the moisture content rises, wood swells, leading to cupping, warping, and buckling. Floors may cup (bend upwards at the edge of each plank) from high humidity alone. Furthermore, any dampness that lingers more than 24 to 48 hours is likely to lead to mold, often hidden underneath the floor..
Phase I: Drying
Most hardwoods have a moisture content of 6 to 12% under normal conditions. But it can rise to 40% in water damage situations. So even after you’ve removed visible water, there’s still a lot left to be dealt with. Enough to raise humidity within the building, which leads to slower drying. Even with good ventilation to remove moisture-laden air, it can take as long as 4 to 6 weeks to get things fully dry. But mold and damage get going in just a couple of days. So don’t wait to let things dry naturally!
It’s critical to first remove as much dampness as possible, as soon and as fast as possible. For smaller incidents, that means using a shop wet-vac, continuing to vacuum for a while even after surfaces appear dry. For major incidents, water damage restoration experts use special-purpose water extraction vacuums. You should also remove rugs, furniture, and anything damp as they contribute to indoor humidity. These items need to be dried quickly to avoid mold and other harm. It’s also important to clean and disinfect all affected materials.
Running air condition helps remove moisture, but that can also distribute mold spores. Do not use heaters or set the thermostat high as this encourages mold and bacterial growth.
To get moisture down to safe levels quickly enough, it’s essential to run several dehumidifiers and fans at their highest settings for 24 hours a day. Typically for several days. Again restoration experts have special equipment — “low grain refrigerant dehumidifiers” that work far more effectively than anything a consumer might find at retail outlets.
The hardwood flooring itself isn’t the only concern. The sub-floor is also likely to be soaked as well. Whether plywood or concrete, it needs time to dry as well. If it can be accessed from below, the affected floor should be dried from both sides. It may also be necessary to remove baseboards and open up wall cavities. Working well beyond surface materials, this is called structural drying.
These aggressive measures typically complete their job in a few days, but in some situations, it may still take several weeks to get all building materials down to safe moisture levels and ready for repairs. On the other hand, drying wood too quickly can lead to splitting and other irreversible damage. And it’s important to frequently test the moisture content of building materials, not just the indoor air’s humidity. Making the measurements and interpreting the results can be tricky. For example, each type of wood has its own ideal EMC — equilibrium moisture content.
Phase II: Repairs
Sometimes aggressive drying can avoid the need for repairs. But that’s far from always. The most common fix is sanding and refinishing the floor. Up to 1/4 inch can be sanded away as a means of dealing with quite a bit of cupping and minor warping. But the surface of wood darkens with age, and sanding reveals a lighter color beneath. So it’s a good idea to sand the entire floor lightly. It’s also important to wait until the floor is completely dry. Otherwise, the degree of bowing can change, and everything has to be done again.
Refinishing just the damaged part of the floor requires some expertise. Not only must the color and type of finish be matched precisely, but the thickness of the final coating can also be tricky to match. That’s especially true for flooring that has been pre-finished at the factory. In that case, it may be better to replace the damaged section, but that requires some pretty extreme carpentry skills not to stand out as a patch.
With more widespread damage, it may be better to replace the entire floor. That’s particularly true if a plywood subfloor needs repair or replacement. That can be the case even if the only problem is mold — any porous material invaded by mold should be replaced. Cleaning and sealing rarely eliminate an issue with mold.


